
Container Gardens
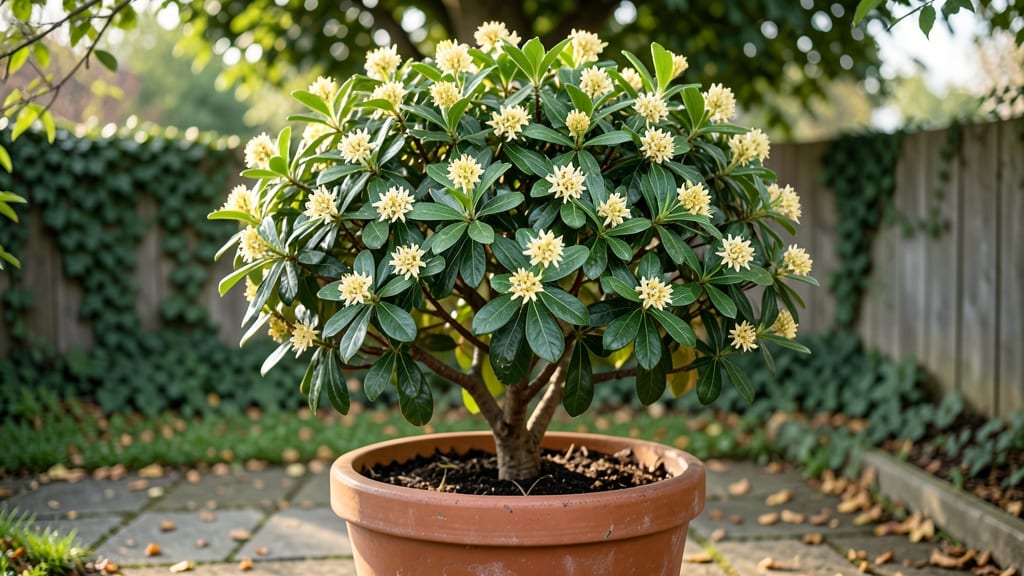
Growing a loquat tree in a pot lets you enjoy sweet citrus fruit even on a tiny balcony. 🌱 I’ve watched my potted loquat go from a bare branch to producing dozens of fragrant yellow fruits in just three seasons—proof that citrus trees thrive in containers with the right care.
The key is matching the tree’s needs to your space: a 15-20 gallon pot for mature trees, well-draining soil, and full sun (at least 6 hours daily). Overwatering is the #1 killer—let the top inch dry between waterings, and always use pots with drainage holes.
Pruning in late winter keeps the tree compact and encourages fruiting.
By summer, you’ll be harvesting sweet, honey-like fruit that ripens right on the branch. The tree stays small enough for patios but produces like an in-ground specimen. Just watch for spider mites (common in dry air) and feed with citrus-specific fertilizer every 6-8 weeks during growing season.
Perfect for urban gardens, small yards, or even sunny windowsills—this tree proves you don’t need a backyard for homegrown citrus. Let’s get your loquat thriving in a pot!
📚 In This Guide
- What you need
- Instructions
- Tips and common mistakes
- Wrapping up and next steps
What you need
- ● Loquat Tree Sapling: Choose a dwarf or semi-dwarf variety (e.g., 'Big Jim' or 'Mogami') for container growth. Ensure it’s disease-free and healthy.
- ● Container: A 15-20 gallon pot (minimum 18" diameter) with drainage holes. Terracotta or fabric pots work well.
- ● Well-Draining Soil: A mix of 60% citrus potting soil, 30% perlite or pumice, and 10% compost (avoid garden soil—it compacts!).
- ● Slow-Release Fertilizer: A balanced citrus fertilizer (e.g., 8-8-8 or 10-10-10) with micronutrients. Apply at planting and every 3-4 months.
- ● Mulch: 2-3 inches of wood chips or pine bark to retain moisture and regulate temperature.
- ● Gloves & Pruners: Sterilized pruners for shaping and gloves to protect your hands.
- ● Watering Can or Hose: With a gentle spray nozzle for even moisture distribution.
- ● pH Test Kit: To check soil acidity (ideal range: 5.5–6.5). Adjust with sulfur or lime if needed.
- ○ Support Stake (Optional): A small bamboo or metal stake if your tree needs extra stability.
- ● Sunlight Access: A south-facing window, balcony, or patio with 6+ hours of direct sunlight daily.
- ● Self-Watering System: A wicking bed or drip irrigation for consistent moisture.
- ● Citrus-Specific Spray: Organic neem oil or copper fungicide to prevent pests/diseases.
- ● Pot Feet or Casters: To move your tree for optimal sunlight or protection from frost.
Step-by-Step guide to growing a loquat tree in a pot
Here’s how to cultivate a productive loquat tree in containers—my go-to method for small spaces.
🪴 Step 1: Select the Right Container and Soil Mix
Choose a 5-gallon pot or larger with drainage holes to prevent root rot. Loquat trees need room to grow, so a 24-inch diameter container works best for mature specimens. I use a mix of 60% well-draining potting soil, 30% perlite, and 10% compost to ensure aeration and nutrients. Avoid garden soil—it compacts and suffocates roots.
Fill the pot halfway with your mix, then place the young tree at the same depth it was growing in its nursery container. Tap the pot gently to settle the soil around the roots, but don’t compact it. Loquats thrive in slightly acidic to neutral soil (pH 6.0-7.0), so test your mix if possible. If you’re unsure, a citrus-specific potting blend works well.
☀️ Step 2: Position for Optimal Sunlight and Temperature
Loquat trees demand full sun exposure—at least 6-8 hours daily—to fruit properly. Place your pot in a south-facing spot or under a grow light if indoor growing. In hot climates, afternoon shade prevents leaf scorch. I’ve seen loquats struggle in temperatures below 25°F, so move potted trees indoors or to a sheltered garage during winter if you live in colder zones.
Watch for yellowing leaves—a sign of too much shade—or browned edges, which mean direct sun is too intense. Adjust placement gradually to avoid shocking the tree. Container-grown loquats also benefit from regular rotation (quarter-turn weekly) to grow evenly. You’ll notice straighter stems and fuller canopies within a few months.
💧 Step 3: Water and Fertilize for Healthy Growth
Water deeply once a week in warm weather, letting the top 2 inches of soil dry out between waterings. Overwatering causes root rot, so check moisture with your finger—damp but not soggy is ideal. In winter, reduce watering to every 2-3 weeks as growth slows. I use a moisture meter to avoid guesswork, especially in terracotta pots that dry out faster.
Fertilize monthly during spring and summer with a balanced citrus fertilizer (10-10-10 or 8-3-9). Cut back to every 6-8 weeks in fall and winter. Loquats are heavy feeders, but too much fertilizer burns roots. You’ll see dark green leaves and new growth as signs it’s working. If leaves yellow between veins, it’s a classic nitrogen deficiency—time to adjust your feeding schedule.
✂️ Step 4: Prune and Maintain for Fruit Production
Prune in late winter or early spring before new growth starts. Remove dead, crossing, or crowded branches to improve airflow and sunlight penetration. I cut back overly long branches by 1/3 to encourage bushier growth. Avoid heavy pruning—loquats produce fruit on older wood, so aggressive cuts reduce harvests. Sterilize pruners with rubbing alcohol to prevent disease.
Thin fruit in early summer to 4-6 inches apart—this prevents branches from breaking under weight. You’ll sacrifice some yield, but the remaining fruit will be larger and sweeter. Watch for aphids or scale insects on new growth; treat with neem oil if you spot sticky residue (honeydew). A healthy loquat tree in a pot can produce fruit in 3-5 years, but patience pays off with juicy, fragrant harvests.
⏰ Step 5: Overwinter and Protect from Cold
Before temperatures drop below 30°F, move your potted loquat to a bright, cool indoor space (like a garage with natural light). If you can’t bring it inside, wrap the pot in bubble wrap and cover the tree with frost cloth. I’ve had loquats survive brief dips to 20°F with this protection, but prolonged cold kills branches. Prune any frost-damaged growth in spring—new shoots will emerge from healthy wood.
Resume outdoor placement in early spring once nighttime temps stay above 40°F. Gradually reintroduce sunlight to avoid leaf burn. With proper care, your potted loquat will reward you with harvests for decades—just like the one in my courtyard that’s been fruiting since I planted it five years ago.
Tips & tricks for thriving potted loquat trees
Here's what nobody tells you about keeping your citrus harvest productive in containers.
Soil Mix Precision: When mixing your 60% well-draining potting soil, 30% perlite, and 10% compost in Step 1, I recommend sifting the compost first to remove any large chunks that could disrupt drainage. The perlite should be clean and free of dust—any residue can create compacted pockets that trap moisture. For the first 6 months after planting, I add a handful of hydrated lime to help stabilize the pH between 6.0-7.0, especially if your tap water is acidic. This small adjustment prevents the soil from becoming too sour over time, which can stress young roots.
Sunlight Strategy: The 6-8 hours of full sun in Step 2 is non-negotiable, but here's the trick: if you notice leaves curling or developing crispy edges during summer, it's not just heat—it's often a sign of transplant shock from moving the pot. I've found that gradually moving the tree to its final sunny spot over 2-3 days (rather than all at once) prevents this. Also, if your south-facing spot gets intense afternoon sun, consider a 50% shade cloth during peak hours (12-3 PM) to prevent leaf scorch while still meeting the sunlight requirement.
Watering Wisdom: That "top 2 inches dry" rule in Step 3 is perfect, but here's what I do differently: I water in the early morning rather than evening to allow foliage to dry completely before nightfall. This prevents fungal issues that can develop from prolonged moisture. For terracotta pots, I actually check the soil weight—when a 5-gallon pot feels noticeably lighter, it's time to water. This method works better than finger tests for me, especially in humid climates where evaporation rates vary.
Fertilizer Timing: The monthly spring/summer feeding schedule in Step 3 is spot-on, but I've learned that half-strength applications work better for container-grown loquats. The roots in pots are more sensitive to salt buildup from concentrated fertilizers. I also mix my fertilizer with water in a spray bottle and apply it to the soil surface before watering—this helps prevent root burn. In fall, when you switch to every 6-8 weeks, I recommend using a low-nitrogen fertilizer (like 5-10-10) to encourage root development rather than new growth that won't harden off before winter.
Pro Tips for Loquat Tree In Pot
- Here's what nobody tells you about keeping your citrus harvest productive in containers.
- Soil Mix Precision: When mixing your 60% well-draining potting soil, 30% perlite, and 10% compost in Step 1, I recomm...
- Sunlight Strategy: The 6-8 hours of full sun in Step 2 is non-negotiable, but here's the trick: if you notice leaves ...
Frequently asked questions
Got questions about growing a loquat tree in a pot? You’re not alone! Here are answers to the most common queries to help you nurture your citrusy companion with confidence.
How big should the pot be for a loquat tree?
A young loquat tree thrives in a 10–12-inch pot for the first year, but plan to upgrade to 15–20 gallons (or larger) as it matures. Loquats have shallow roots, so prioritize width over depth—aim for a container at least 12 inches wide to prevent root binding. Use drainage holes to avoid soggy soil!
When is the best time to plant a loquat tree in a pot?
Plant your loquat tree in early spring (after the last frost) for optimal growth. If you’re repotting an established tree, do it in late winter or early spring before new growth begins. Avoid transplanting in summer heat—roots stress easily, and recovery takes longer.
Can I grow a loquat tree indoors?
Loquats prefer outdoor conditions but can thrive indoors near a sunny south-facing window with supplemental grow lights (12+ hours/day). If indoors, expect smaller fruit or no fruit due to limited sunlight. Outdoor pots (with winter protection) yield the best harvests—think of it as a patio citrus tree!
Why aren’t my loquat tree leaves turning yellow?
Yellow leaves often signal overwatering, poor drainage, or nutrient deficiencies. Check these fixes:
- Watering: Let the top 1–2 inches of soil dry out between waterings.
- Drainage: Ensure the pot has holes and use a well-draining mix (50% potting soil, 30% perlite, 20% sand).
- Nutrients: Feed with a citrus-specific fertilizer every 4–6 weeks in growing season.
If yellowing persists, test for iron deficiency (common in alkaline soils) and amend with chelated iron.
How do I overwinter a potted loquat tree?
Loquats are semi-tropical—protect them from frost (below 25°F/-4°C) by:
- Moving pots to an unheated garage or shed (keep above freezing).
- Wrapping the pot in bubble wrap or frost cloth for extra insulation.
- Reducing watering to every 3–4 weeks (soil stays moist but not soggy).
Resume regular care in spring once temperatures stabilize.
What’s the fastest way to get fruit from a potted loquat?
Patience is key—loquats take 3–5 years to bear fruit in pots! Boost chances with:
- Full sun (6+ hours/day)—critical for flowering/fruiting.
- Balanced fertilizer (high in phosphorus for blooms).
- Hand-pollinate flowers with a soft brush if bees are scarce.
- Avoid overpruning—remove only dead/diseased branches.
Bonus: Dwarf varieties (like ‘Big Jim’) fruit sooner than standard types.
Wrapping up and next steps
Growing a loquat tree in a pot is a rewarding way to enjoy citrusy fruit—even in small spaces! With the right container, soil, and care, you’ll soon savor sweet, fragrant harvests year after year.
Whether you’re a beginner or a seasoned gardener, this compact citrus tree proves that big rewards come in small packages.
Now that you’re equipped with the know-how, pick your pot and get planting! Share your progress with fellow plant lovers or explore more container gardening tips to expand your green thumb adventures. Happy growing! 🌱✨