
Container Gardens
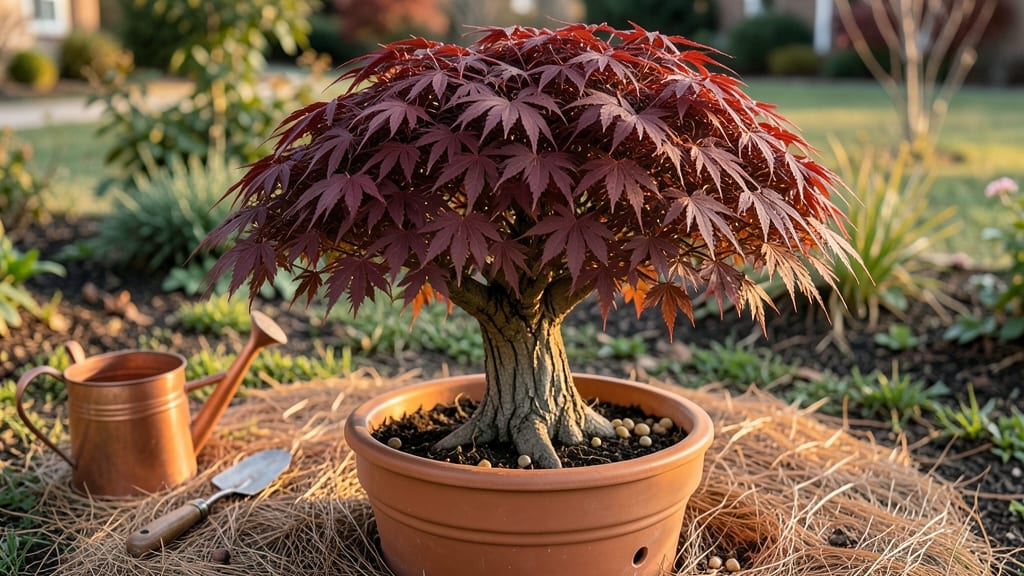
Caring for a Japanese maple tree in pots turns your patio into a living art gallery. 🌿 The key to keeping those delicate leaves vibrant isn't complicated—it's about matching their natural forest floor needs to container life.
I've learned the hard way that skipping one step (like drainage) can turn a stunning specimen into a sad, yellowing shadow in just a season.
Start with the right pot—10-15 gallons for dwarf varieties—and soil that mimics their acidic mountain home. My first attempt with regular potting mix left the roots soggy and the leaves scorched.
Now I use a mix of 50% organic matter, 30% bark, and 20% perlite, which keeps moisture balanced and roots breathing. Water when the top inch feels dry, but never let it sit in saucers—Japanese maples hate wet feet.
You'll see the difference in just a few weeks: deep reds stay rich, new growth emerges faster, and the branches hold their shape instead of flopping. Prune in late winter to shape and remove dead wood, and feed lightly with balanced fertilizer every 6-8 weeks during growing season.
The payoff? A tree that thrives in your smallest corner, looking like it belongs in a Kyoto garden.
Seasonal shifts are the real game-changer. Move pots to morning sun in summer, protect from winter winds with burlap, and never let temperatures drop below 10°F without winterizing. Most problems—yellow leaves, stunted growth—come from ignoring these small adjustments. With these tweaks, your Japanese maple will outlast store-bought annuals by decades.
📚 In This Guide
- What you need
- Instructions
- Tips and common mistakes
- Wrapping up and next steps
What you need
- ● Container: A well-draining pot (12–18 inches in diameter for dwarf varieties) with drainage holes. Terracotta or ceramic pots are ideal for heat dissipation.
- ● Quality potting mix: A lightweight, well-aerated blend (e.g., 50% peat moss or coconut coir, 30% perlite or pumice, 20% compost). Avoid heavy garden soil!
- ● Japanese maple tree: A dwarf variety (e.g., ‘Mikura-zakura’, ‘Bloodgood’, or ‘Emperor I’) from a reputable nursery.
- ● Slow-release fertilizer: A balanced, organic option (e.g., 10-10-10 or fish emulsion) for the planting season.
- ● Mulch: Organic mulch (e.g., pine bark fines or shredded leaves) to retain moisture and regulate temperature.
- ● Watering can or hose with a gentle spray nozzle: For deep but controlled watering.
- ● Pruning shears: Sharp, sterilized shears for shaping and maintenance.
- ○ Support stake (optional but helpful): A bamboo or metal stake (3–4 feet tall) to stabilize young trees in windy areas.
- ● Pot feet or saucers: To protect surfaces and prevent root rot from excess water.
- ● Liquid fertilizer (e.g., seaweed extract): For a mid-season nutrient boost.
- ● Tree guard or mesh: To deter pests like spider mites or aphids.
- ● pH testing kit: To monitor soil acidity (Japanese maples prefer slightly acidic soil, pH 5.0–6.5).
- ● Decorative elements: Gravel, moss, or ornamental stones for a natural, Zen-inspired look.
Step-by-step guide to cultivating dwarf Japanese maples in containers
Mastering container culture for these stunning trees ensures vibrant foliage and long-term health—here’s how to do it right.
🪴 Step 1: Select the Right Pot and Soil Mix
Choose a container with drainage holes at least 2-3 inches larger in diameter than your tree’s root ball—this prevents root rot while allowing expansion. I prefer unglazed ceramic because it breathes and regulates moisture better than plastic, especially in hot afternoons. The pot should be at least 18 inches wide for mature dwarf varieties like 'Bloodgood' or 'Emperor I'.
Use a well-draining, acidic mix (pH 5.0-6.5). I blend 50% high-quality potting soil, 30% orchid bark, and 20% perlite to mimic the aerated forest floor these trees prefer. Add a slow-release fertilizer (14-14-14) at planting time—this feeds roots gradually without burning them. Tap the pot gently after filling to eliminate air pockets, then water until moisture runs freely from the drainage holes.
☀️ Step 2: Position for Light and Shelter
Dwarf Japanese maples thrive in morning sun and afternoon shade—this prevents leaf scorch while providing enough light for vibrant color. In hot climates, dappled shade all day works better than full sun. I place mine near a north-facing window or under a light canopy, rotating the pot quarter-turn weekly so growth stays even. Avoid south-facing spots unless you have afternoon shade protection.
Wind is their enemy—strong gusts dry leaves and break branches. Position your pot where it’s sheltered by walls, fences, or other plants. If outdoor space is windy, bring the tree indoors during storms or use a burlap windbreak on the exposed side. You’ll notice healthier foliage and fewer browned edges within weeks of proper placement.
💧 Step 3: Water Deeply and Consistently
Water when the top 1-2 inches of soil feel dry—stick your finger in to check. These trees hate soggy roots but also despise drought stress. In summer, I water every 2-3 days, while winter care drops to once a week unless the pot feels light. Always water slowly at the base to avoid wetting leaves, which can cause fungal issues. Let excess water drain completely—no saucers unless they’re emptied after 30 minutes.
Mulch with 1-2 inches of pine bark fines to retain moisture and regulate temperature. I refresh this layer every spring, keeping it 2 inches away from the trunk to prevent rot. Overwatering is the #1 killer—yellowing leaves or wilting despite damp soil means you’re drowning the roots. Adjust your schedule based on the pot’s size and your climate.
✂️ Step 4: Prune for Shape and Health
Prune in late winter or early spring before new growth starts. Remove dead, crossing, or weak branches first—these compete for energy. For shaping, cut just above a bud or leaf node at a 45-degree angle to encourage healing. I avoid heavy pruning unless necessary, as Japanese maples respond poorly to drastic cuts. A light trim to maintain form is enough for dwarf varieties.
Watch for aphids or spider mites—these pests love tender new growth. Spray with neem oil at the first sign of sticky residue or webbing. Prune infected branches immediately and dispose of them away from your garden. After pruning, apply a balanced liquid fertilizer (10-10-10) to support recovery. You’ll see fresh, vibrant leaves within 4-6 weeks of proper pruning.
⏰ Step 5: Winterize for Cold Protection
If temperatures drop below 20°F, wrap the pot in bubble wrap or frost cloth and move it to a protected location like a garage or under an eave. Dwarf varieties are hardier than they look, but young trees or small pots freeze more easily. I bury the pot halfway in straw mulch for extra insulation. Reduce watering to once every 3-4 weeks—overwatering in winter suffocates roots.
Check weekly for ice buildup on branches—tap it off gently to prevent breakage. Resume normal care in spring when daytime temps stay above 50°F. You’ll know winterizing worked if the tree bursts with new growth by early May. Avoid fertilizing until you see fresh leaves—dormant trees need rest, not nutrients.
Tips & tricks for perfect Japanese maple tree care in pots
These little-known strategies will help your dwarf Japanese maple thrive for years—without the common pitfalls that stunt growth.
Pot Selection Wisdom: Unglazed ceramic pots are ideal, but if you must use plastic, choose one with at least 2-3 inches more diameter than your tree's root ball to compensate for its poor moisture regulation. I've seen plastic pots cause root rot within months because they trap too much heat and moisture. For extra insurance, add a 1-inch layer of gravel at the bottom of any pot before adding soil—this improves drainage without sacrificing root space. The 18-inch minimum width is non-negotiable for mature dwarf varieties like 'Bloodgood' or 'Emperor I'.
Soil Mix Secrets: That 50-30-20 blend of potting soil, orchid bark, and perlite isn't just arbitrary—it's about mimicking the tree's natural forest floor environment. The orchid bark breaks down slowly, creating air pockets that prevent compacted soil, while perlite prevents waterlogging. Here's what I do differently: I sift the mix through a 1/4-inch mesh screen before planting to eliminate large clumps that could suffocate roots. Also, test your pH—if it's above 6.5, add elemental sulfur gradually until you reach the ideal 5.0-6.5 range.
Light Positioning Hacks: The quarter-turn weekly rotation isn't just about even growth—it's about preventing the tree from leaning toward the light source. I mark the pot's position with a small flag or use a permanent marker on the pot rim to track orientation. For indoor growers, a south-facing window with sheer curtains works better than a north-facing one because it filters harsh afternoon sun while still providing bright morning light. If you notice leaves turning yellow on one side, that's your tree begging for better light distribution.
Winter Care Rescue Strategy: When temperatures drop below 20°F, I take an extra step: I place a heating cable around the pot (wrapped in bubble wrap) for especially cold nights. This prevents the soil from freezing solid, which can kill roots even in hardy dwarf varieties. The straw mulch should cover the pot completely, not just the soil—this protects the root ball from temperature swings. And that 50°F threshold for resuming normal care? I wait until daytime temps consistently stay above 55°F for at least a week to be safe, especially for young trees.
Pro Tips for Japanese Maple Tree Care In Pots
- These little-known strategies will help your dwarf Japanese maple thrive for years—without the common pitfalls that s...
- Pot Selection Wisdom: Unglazed ceramic pots are ideal, but if you must use plastic, choose one with at least 2-3 inch...
- Soil Mix Secrets: That 50-30-20 blend of potting soil, orchid bark, and perlite isn't just arbitrary—it's about mimic...
Frequently asked questions
Got questions about keeping your Japanese maple thriving in pots? You're not alone! Here are answers to the most common concerns—whether you're a first-time container gardener or just looking to refine your skills.
How often should I water my potted Japanese maple?
Water your Japanese maple when the top 1-2 inches of soil feel dry. In summer, this could be every 2-3 days, while winter may require watering only once a week. Overwatering is worse than underwatering! Ensure pots have drainage holes to prevent root rot. Pro tip: Use your finger to check moisture—if it’s damp, wait a day or two.
Can I leave my potted Japanese maple outside in winter?
It depends on your climate! If temps drop below 10°F (-12°C), move your pot to a sheltered spot (like a garage or under an eave) or wrap it in burlap. For milder winters (above 20°F/-7°C), mulch heavily with straw or leaves and avoid southern exposure. Dwarf varieties are slightly hardier but still benefit from protection.
What’s the best soil mix for a Japanese maple in a pot?
Use a well-draining, acidic mix (pH 5.0–6.5). Combine 50% high-quality potting soil, 30% perlite or pumice, and 20% organic matter (like compost or pine bark). Avoid garden soil—it compacts and suffocates roots. Bonus: Add a handful of sphagnum peat moss to retain moisture without sogginess.
Why are the leaves on my potted Japanese maple turning yellow or curling?
Yellowing leaves often signal overwatering or nutrient deficiency. Check for:
- Root rot: Brown, mushy roots? Repot in fresh soil and trim affected roots.
- Nitrogen deficiency: Feed with a balanced fertilizer (10-10-10) in spring/summer.
- Sunburn: Curling from too much direct sun? Move to partial shade (3–6 hours of morning sun).
- Pests: Spider mites or scale? Wipe leaves with neem oil or insecticidal soap.
How big should the pot be for a dwarf Japanese maple?
Start with a pot 12–18 inches wide for dwarf varieties (like ‘Mikura’ or ‘Little Princess’). Aim for 3–5 inches of depth per year of growth. If roots circle the pot, it’s time to upgrade by 2–4 inches in diameter. Remember: Larger pots = more soil = more watering needs. Use terracotta for breathability or fabric grow bags for better root health.
Wrapping up and next steps
Caring for a Japanese maple in pots is a rewarding way to bring nature’s elegance to small spaces—just remember: patience, proper drainage, and seasonal love are your best tools! 🌿 With the right dwarf variety, container, and a touch of TLC, your tree will thrive for years, gracing your patio or balcony with stunning foliage.
Now that you’re armed with tips, grab that pot and get planting! Ready to watch your tiny tree grow into a showstopper?