
Pruning
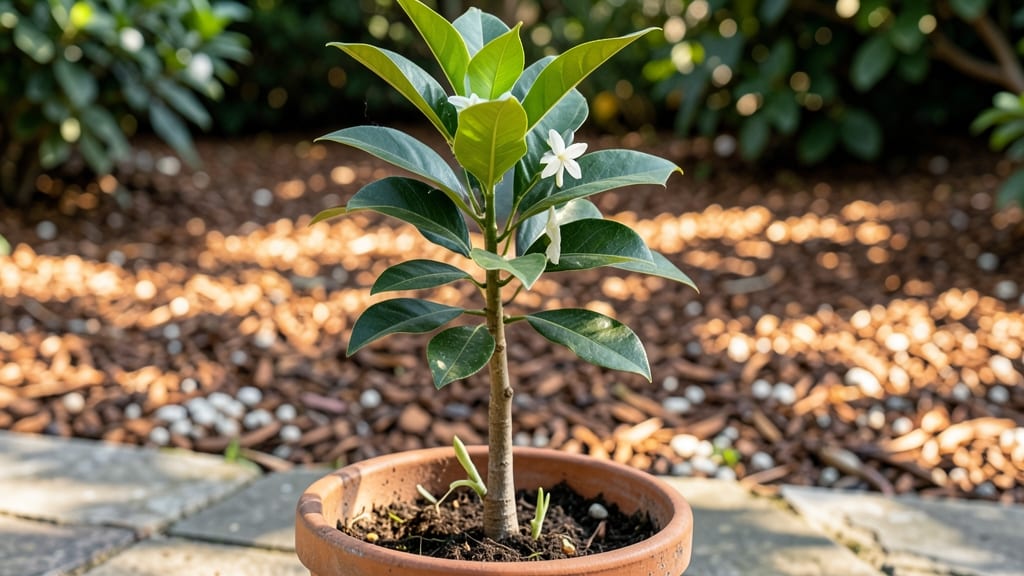
Growing an orange tree from a sprout is like nurturing a tiny citrus dream into a sun-drenched reality. 🌱 The key to success starts with understanding where that first sprout came from—whether it popped up unexpectedly in your kitchen or you planted one from a seed—and how to give it the perfect conditions to thrive.
Unlike store-bought saplings, a homegrown sprout connects you directly to the tree’s journey, making every milestone feel like a personal victory.
This isn’t about luck; it’s about precision. You’ll need well-draining soil, a sunny spot (at least 6 hours of direct light daily), and a watering routine that keeps the roots happy without drowning them.
Start indoors if you’re in a cooler climate, then transition outdoors once temperatures stay above 50°F at night. The first year is all about building strong roots and branches—think of it like laying the foundation for a house you’ll live in for decades.
By the time your sprout hits 12-18 months old, you’ll be pruning for shape and health, not just growth. A well-pruned tree produces more fruit, resists disease, and grows stronger branches to hold those heavy oranges.
The smell of fresh citrus leaves alone will make the effort worth it—imagine harvesting your own fruit in just a few years.
Whether you’re dealing with leggy growth, yellowing leaves, or pests, this guide covers the fixes. The real magic happens when you see that first tiny blossom, knowing you nurtured it from a single sprout. Let’s get those roots growing!
📚 In This Guide
- What you need
- Instructions
- Tips and common mistakes
- Wrapping up and next steps
What you need
- ● Orange tree sprout: A healthy, disease-free cutting (4–6 inches long) with at least 2–3 leaves and a small root base (if available).
- ● Well-draining potting mix: A blend of 50% peat moss or coconut coir, 30% perlite, and 20% sand (or a pre-mixed citrus/succulent mix). Quantity: Enough to fill a 6–8 inch pot.
- ● Small pot or container: 6–8 inches in diameter with drainage holes. Material: Plastic, terracotta, or fabric grow bags.
- ○ Rooting hormone (optional but recommended): A powder or gel to boost root growth.
- ● Pruning shears or sharp scissors: Clean, sterilized tools for trimming the sprout.
- ● Spray bottle: For misting the sprout to maintain humidity.
- ○ Clear plastic bag or humidity dome: To create a greenhouse effect (optional but helpful for tropical climates).
- ● Bright, indirect sunlight: Place the sprout near a south-facing window or under grow lights (12–16 hours/day).
- ● Warmth: Ideal temperature range: 70–85°F (21–29°C). Avoid drafts or cold spots.
- ● Watering can or spray bottle: For gentle hydration (avoid overwatering!).
- ● Patience: Root growth can take 4–8 weeks—consistency is key!
- ● Fertilizer: A balanced citrus fertilizer (e.g., 6-6-6 NPK ratio) diluted to half-strength, applied every 4–6 weeks once roots establish.
- ● Mulch: A thin layer of organic mulch (like pine bark) to retain moisture.
- ● pH test kit: To monitor soil pH (ideal range: 6.0–7.0 for citrus).
- ● Support stake: For taller sprouts to prevent bending as they grow.
Step-by-step guide to pruning your orange tree sprout
Here's how to keep your citrus tree healthy and productive with simple, effective cuts.
✂️ Step 1: Identify and Remove Dead or Diseased Branches
Start by examining your orange tree for any branches that look brown, brittle, or mushy at the base. These are dead or diseased and need immediate removal. Use clean, sharp pruning shears to make a clean cut just outside the branch collar—the swollen area where the branch meets the trunk. This ensures the tree can heal properly without leaving a jagged wound.
If you spot any branches with unusual spots, mold, or insects, bag them and dispose of them in the trash. Never compost diseased plant material—it spreads problems to other plants. I always wear gloves for this step to avoid any potential skin irritation from sap or pathogens.
✂️ Step 2: Thin Out Crowded or Crossing Branches
Look for branches that grow too close together or cross over each other. These compete for sunlight and nutrients, weakening the tree. Choose the thinner or weaker branch to remove—this is where precision matters. Cut it back to the branch collar, making sure not to leave any stubs. Stubs can trap moisture and invite rot.
If you have a branch growing straight upward, you might want to trim it back by about one-third to encourage a more open, bushy shape. This also helps air circulate better, reducing humidity-related diseases. Watch for new growth in these areas within 4-6 weeks—that's your sign the tree is responding well.
✂️ Step 3: Shape the Tree for Better Airflow and Light
Step back and visualize how your tree will look after pruning. Aim for an open center with sunlight reaching all branches. Start by cutting back any branches growing inward. These are often the ones that block light from reaching the center of the tree. Use your shears to trim them back to a healthy outward-facing branch or bud.
For larger branches, make your cut just above an outward-facing bud or branch. This encourages new growth in the right direction. Avoid cutting into the trunk itself—this can harm the tree. If you're unsure where to cut, look for a small bump or swelling on the branch; that's usually a bud waiting to grow.
☀️ Step 4: Prune for Flower and Fruit Production
To encourage more flowers and fruit, focus on the tree's growth points. Cut back any branches that are growing too vigorously straight upward—they often produce fewer flowers. Instead, trim them to a side branch or bud that grows at a 45-degree angle or less. This redirects energy toward fruit production.
If your tree has produced fruit but you want to control the harvest, thin out some of the smaller branches. This ensures the remaining fruit gets enough nutrients and sunlight to grow larger and sweeter. After pruning, give your tree a good drink of water to help it recover. You'll notice new growth within 2-3 weeks, signaling the tree is thriving.
⏰ Step 5: Clean Up and Monitor Growth
After pruning, clean your shears with rubbing alcohol to prevent the spread of disease. Remove any fallen leaves or small branches from the ground around the tree. These can harbor pests or fungi that might reinfect your tree. Once everything is tidy, step back and admire your work—your tree should look healthier and more balanced.
Keep an eye on the tree over the next few weeks. If you see any new branches growing in the wrong direction, you can trim them back early to maintain the shape you want. Regular pruning, even just a little every few months, keeps your orange tree sprout productive and beautiful year-round.
Tips & tricks for precision pruning of orange tree sprouts
These simple yet powerful techniques will help you prune like a pro—saving your tree from common mistakes and setting it up for years of abundant growth.
Timing is Everything: The best time to prune your orange tree sprout is during late winter or early spring, just before new growth begins. This timing gives your tree the entire growing season to recover and benefit from your cuts. Avoid pruning in fall or winter when the tree is dormant, as this can leave it vulnerable to cold damage. If you must prune outside this window, do it on a mild day when temperatures are above freezing.
Tool Preparation Matters: Before you begin, sharpen your pruning shears and sterilize them with rubbing alcohol to prevent spreading disease between cuts. Dull blades can crush branches instead of making clean cuts, which stresses the tree. I also recommend having a small bucket or bag handy to collect pruned branches and debris—this keeps your workspace clean and makes disposal easier. A pair of sharp bypass pruners works best for branches up to ½-inch thick, while loppers handle thicker branches up to 2-inches.
Visual Growth Cues: When shaping your tree in Step 3, look for the small bumps along branches—these are buds waiting to grow. Cutting just above a bud that faces outward encourages new growth in the right direction. For upward-growing branches in Step 4, aim to trim them back to a bud that grows at a 45-degree angle or less. This subtle angle helps create a natural, open canopy that lets sunlight reach all parts of the tree. You'll notice new growth emerging from these buds within 2-3 weeks, confirming you've made the right cuts.
Seasonal Pruning Strategy: For young orange tree sprouts, focus on removing only dead, diseased, or crossing branches during the first year. This gentle approach gives the tree time to establish its root system without excessive stress. In subsequent years, you can be more aggressive with shaping, but never remove more than one-third of the tree's foliage in a single session. This rule prevents over-stressing the tree and ensures it has enough leaves to produce energy through photosynthesis.
Pro Tips for Orange Tree Sprout
- These simple yet powerful techniques will help you prune like a pro—saving your tree from common mistakes and setting...
- Timing is Everything: The best time to prune your orange tree sprout is during late winter or early spring, just befo...
- Tool Preparation Matters: Before you begin, sharpen your pruning shears and sterilize them with rubbing alcohol to pr...
Frequently asked questions
Got questions about nurturing your orange tree sprout?
You’re not alone! Here are answers to the most common queries—from timing tips to troubleshooting tricks—to keep your citrus companion thriving.
How do I know when my orange tree sprout is ready for its first pruning?
Prune your orange tree sprout after it’s established (about 6–12 months old) and has 3–5 mature leaves per branch. Avoid pruning during flowering or fruiting—focus on shaping in late winter or early spring when new growth starts. Pro tip: Use clean, sharp shears to prevent disease!
Can I prune my orange tree sprout in summer? What are the risks?
Summer pruning can stress your sprout, especially in hot climates, but it’s possible if you’re addressing dead/diseased branches. Do it early morning to reduce shock, and avoid heavy cuts. Risk: Over-pruning now can stunt growth or delay fruiting. Stick to light trims if needed.
What if my orange tree sprout keeps growing leggy? How do I fix it?
Leggy growth usually means your sprout needs more light or balanced pruning. Trim the top 2–3 inches of leggy stems to encourage bushier growth, and place it in a sunny spot (6+ hours of light daily). Bonus: Rotate the pot weekly for even sunlight exposure!
Will pruning my orange tree sprout affect fruit production?
Pruning correctly actually boosts fruit! Removing dense or crossing branches improves airflow and sunlight penetration, leading to healthier blooms and fruit. Just avoid heavy cuts during flowering (late winter/early spring). Goal: Aim for an open, vase-like shape.
What’s the best alternative if my orange tree sprout isn’t thriving after pruning?
If your sprout struggles post-pruning, check for root bound pots, over/under-watering, or pests (like aphids). Try repotting into a slightly larger container with fresh soil, or move it to a warmer spot. If issues persist, consider propagating a cutting from a healthy branch.
Wrapping up and next steps
Growing a thriving orange tree starts with precision pruning—and you’ve got all the tools to make it happen! 🌱 From selecting the right tools to mastering cuts for year-round growth, every step ensures your tree stays healthy and productive.
Whether you’re a beginner or a seasoned gardener, patience and practice will yield sweet rewards.
Now that you’re armed with knowledge, roll up your sleeves and give your orange tree sprout the care it deserves. Start pruning today—your future harvest (and that fresh orange scent!) will thank you. 🍊✨